I’ve got a bit of a thing for preserves at the moment – salted lemons, olives, sun-dried tomatoes and even limoncello (hint: look out for these coming attractions right here on Inspired Nourishment). Today I thought I’d share a very simple recipe for naturally preserved cucumbers, which are my latest ‘have with everything’ condiment.
I first came across the recipe some time ago on Mark’s Daily Apple while doing research for a paleo article I was writing for someone else. What grabbed my attention was the very interesting fact that when you preserve vegetables this way, not only are they crunchy and delicious, but they’re also packed with probiotics and therefore great for the digestive system, especially if you’ve recently been on a course of antibiotics (something I try to avoid at all costs). And in case you’re wondering, they’re different from store-bought gherkins as they don’t use vinegar (which kills those helpful probiotics) and they taste salty rather than tangy. As my attention was elsewhere at the time, I saved the recipe on one of my Pinterest boards for later use.
The most difficult part of this process is actually finding the baby cucumbers, which are often called Israeli cucumbers here in South Africa. If you can’t get your hands on any, you can apparently use just about any kind of fairly hardy vegetable, like carrots, cabbage, radishes or broccoli. I haven’t yet tried any of those so can’t personally vouch for them, although I’ve seen them in various health shops and there are plenty of recipes online.
I finally spotted some cute mini-cucumbers in the supermarket the other day and decided it was time to experiment. I’m happy to say they turned out extremely well and I’ve since been through a couple of batches.
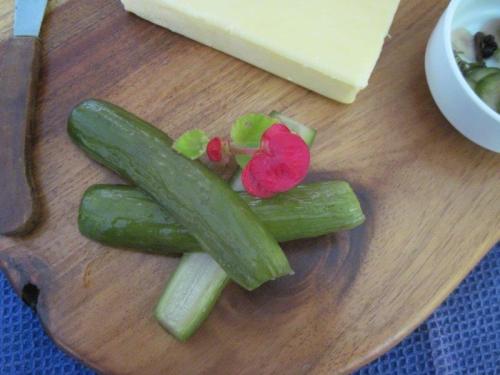
I’ve discovered they go well with loads of things – so far I’ve enjoyed them with eggs, avocados, salad, cheese, smoked salmon, chicken and potato, and have no intention of stopping there. If you make them, please do let me know what else you’ve successfully tried them with – the possibilities are endless!
PRINT RECIPE (Print-friendly version)
Ingredients
- About 8 small cucumbers (or other veg if you’re feeling adventurous)
- 1½c boiling water
- 2T coarse sea salt (not iodised table salt)
Herbs of your choice e.g.
- ½t whole peppercorns
- ½t mustard seeds
- ½t whole cloves
- 2-3 bay or lime leaves
- 1-2 cloves garlic, peeled and sliced
- A few sprigs of fresh thyme
- Chilli to taste – I used just the tip of one, without seeds
Method
Put the salt and boiling water in a heat-proof jug or bowl and stir until the salt dissolves. You need to let the water cool completely again so do this an hour or so earlier than you plan to do the actual preserving.

Wash the cucumbers and cut off the tops and tails, then halve them lengthwise. I also did some whole this first time round and they taste the same, but I find them easier to manage when they’re halved.


Put half your herbs and spices into a clean jar.


Put the cucumbers into the jar, packing them in lengthwise, and add the rest of the herbs and spices on top.

If you have a handy little plastic thingy like this (from a box given to me by my stepmother – thanks, Jenny!), place it on top. If not, cut a halved cucumber in half again, this time cross-ways, and lay the two halves on top of the other cucumbers, flat sides down. Your aim is to keep the other cucumbers underwater, even if you need to throw away the top ones eventually.

Pour the cooled brine into the jar to completely cover the cucumbers, preferably by at least a few centimetres.

Then put the lid loosely on top, so the contents can breathe a little.

Leave them like this, not in the fridge, for a few days. After a couple of days you’ll notice bubbles rising through the water and the water becoming slightly cloudy, which tells you the fermentation process is happening. I haven’t yet experienced this myself but if a bit of mould forms on the water surface, you can just scoop it off.
If the weather is hot, try a sample after 3 days to see how it tastes. It really is a matter of preference how long you leave them – I found mine tasted good to me after 6 days (autumn weather). When you’re happy with the taste, put the lid on properly and store them in the fridge. Some recipes say they only last a week but I’ve had some in the fridge for nearly 3 weeks now and they’re absolutely fine. Just use your discretion – if they smell, look or taste funny, throw them out.
Enjoy with eggs, avocados, salad, cheese, smoked salmon, chicken, veggies or whatever else takes your fancy.
Note: To get a pickle or two out the jar, use a clean fork (you don’t want to add any extra bacteria to an already fermented condiment). When you’re done, make sure the remaining pickles are still covered with liquid and store the jar back in the fridge.

PRINT RECIPE (Print-friendly version)
© Alexandra Lawrence and Inspired Nourishment, 2015

Pingback: Nasturtium Pizza Omelette | Inspired Nourishment